The following description and screenshots should guide you to setup a new Apple iPhone Outlook Account for your @pt.lu email address as well as modify an existing one to comply to POST’s email security policy.
For demonstration purposes, we will use the dummy email address max.mustermann@pt.lu. When configuring your Outlook app, please use the credentials as provided by POST Luxembourg during your initial service order.
- Install Outlook app
- Add Email Account
- Select Provider
- IMAP Incoming Mail Server Setup
- SMTP Outgoing Mail Server Setup
- Finalizing your email account setup
- Modifications on an existing Email Account
1. Install Outlook app
Download the Microsoft Outlook app from the iOS App Store.
The icon of the app looks as following:

Open the app and follow the steps below to proceed.
2. Add Email Account
If it’s your first time using Outlook for iOS or you don’t have already defined another email account, the app will invite you to enter your email address as following:
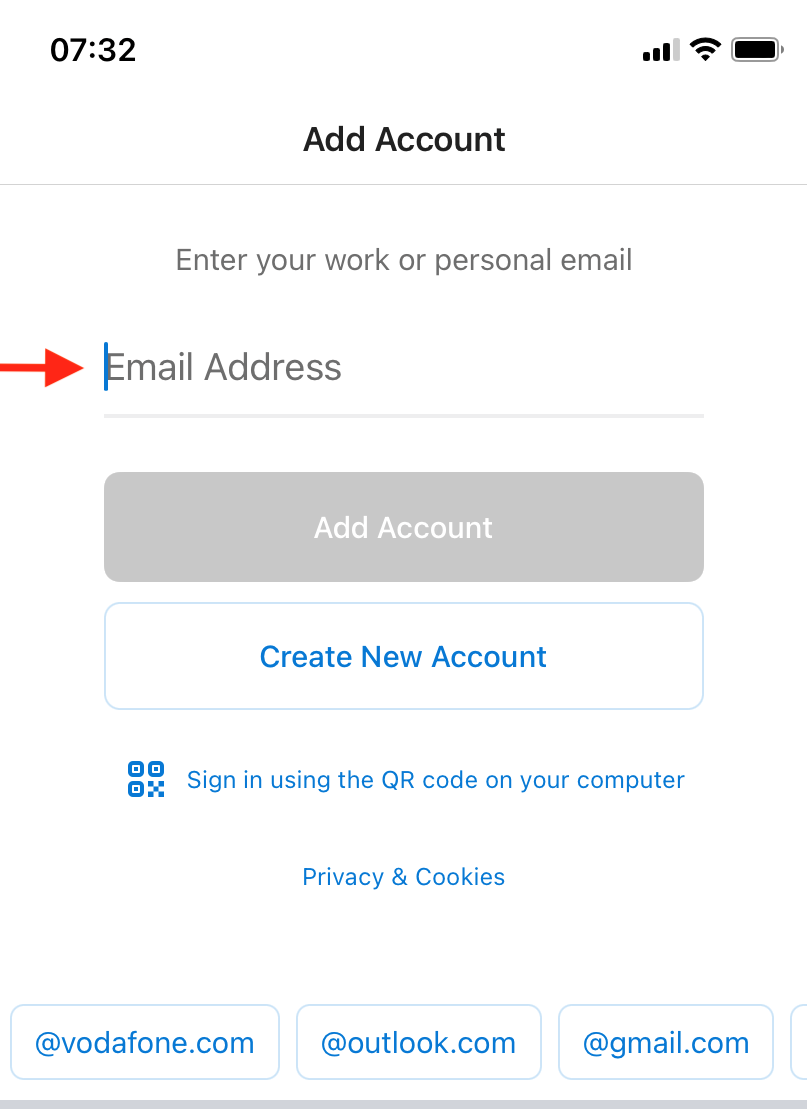
Enter your @pt.lu Email Address and confirm via the ‘Add Account‘ button.
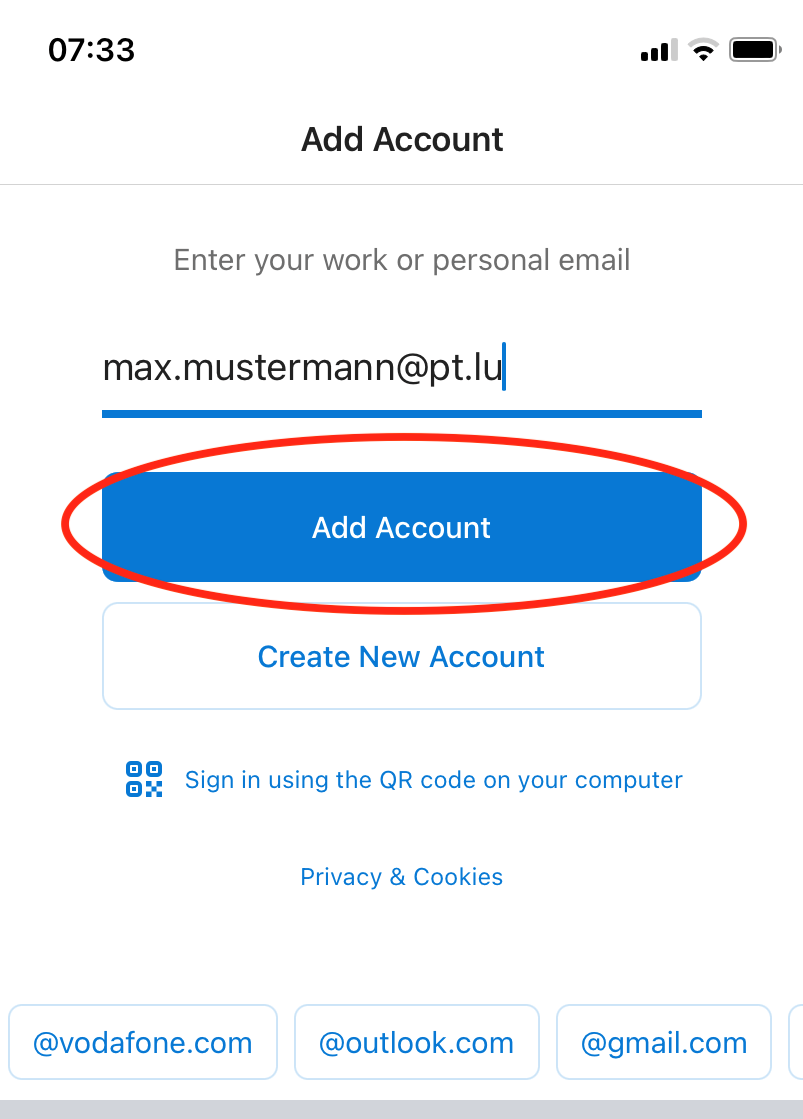
By default, the Outlook app will now try to configure your email address like a Microsoft Exchange account.
As the @pt.lu email address is not based on Exchange technology, the process will take some time.
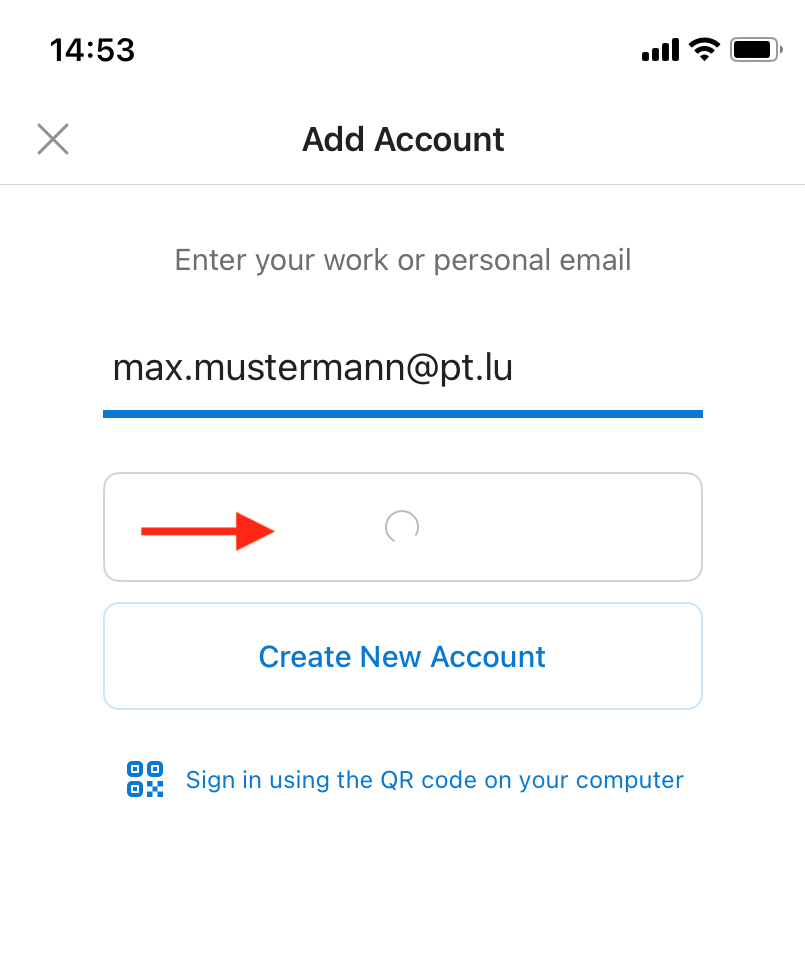
During this process a specific menu will appear as following- allowing you to select a manual setup of your email account:
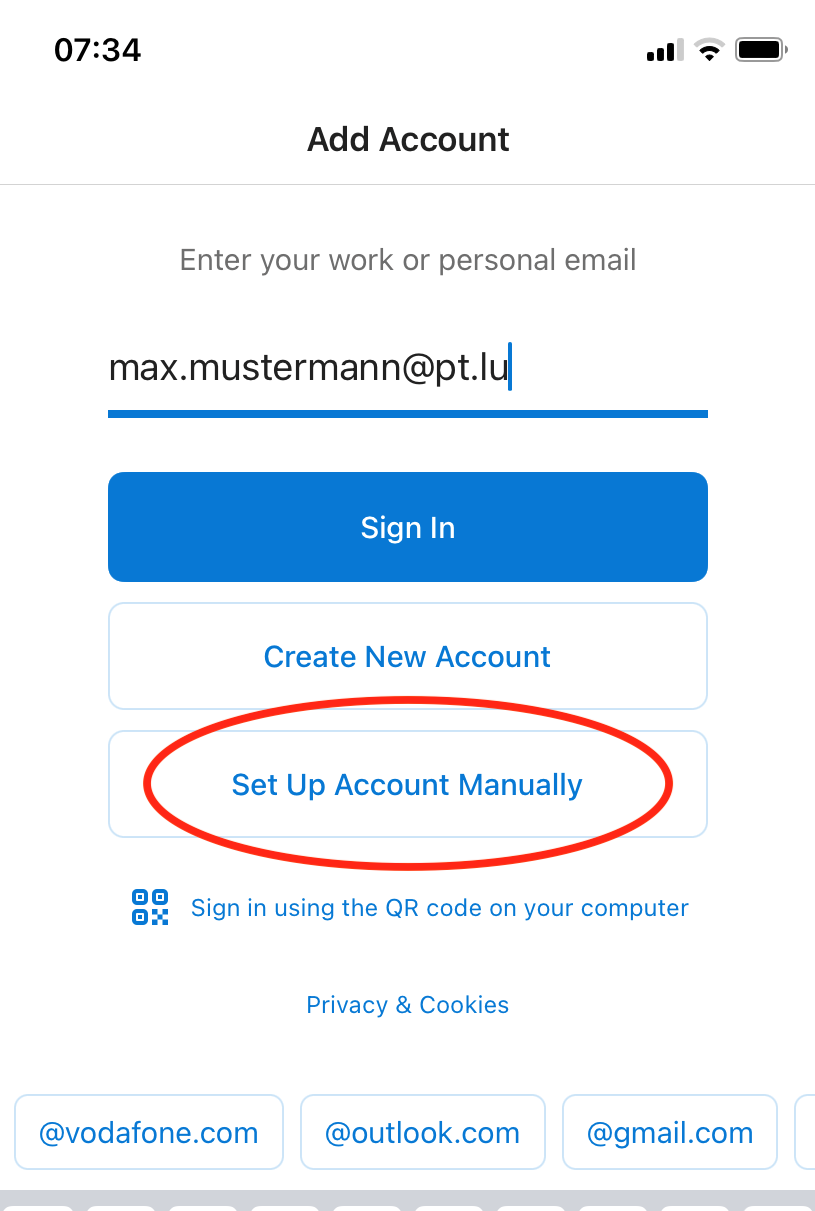
Push the ‘Set Up Account Manually‘ button as soon as it appears on the panel.
If you miss the opportunity to select a manual email account setup, the process will end nevertheless after a minute and display a panel as following:
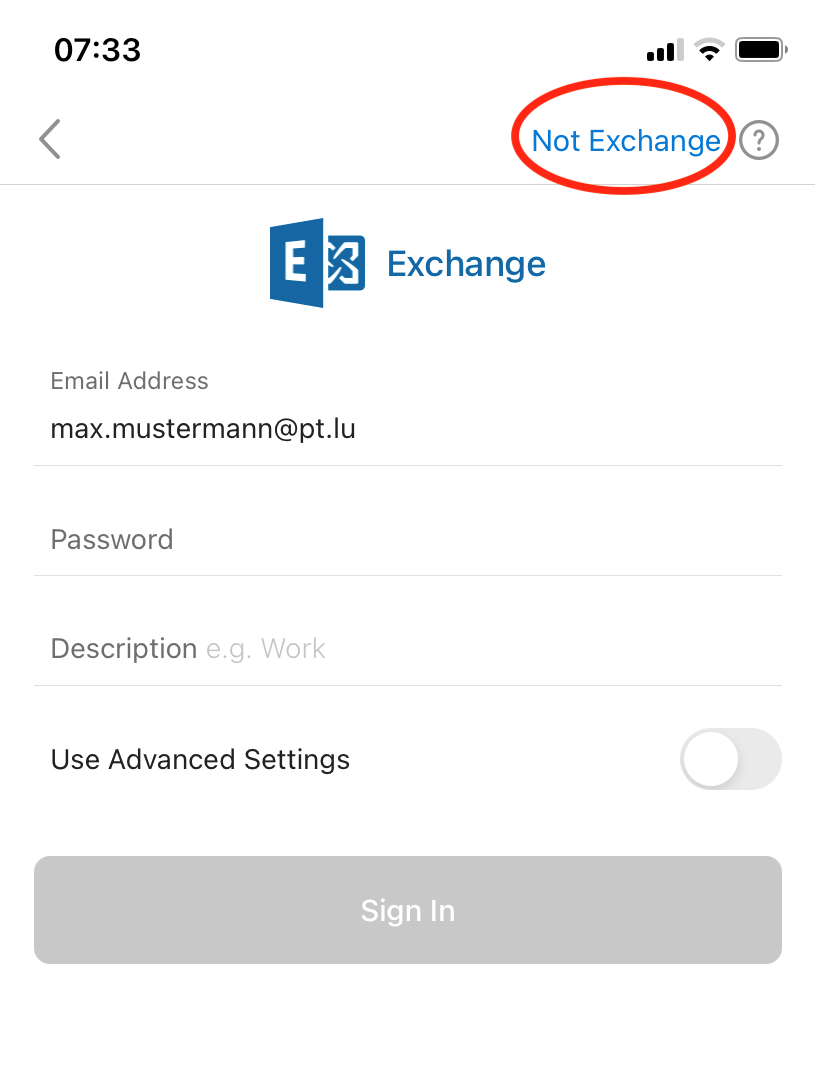
Now, to proceed push on the ‘Not Exchange’ button to confirm your @pt.lu email account setup.
3. Select your provider
Independently of your choice by interrupting the process and selecting the manual email setup or selecting ‘Not Exchange’ when the process finalized, the next panel will offer your to select your email service provider:
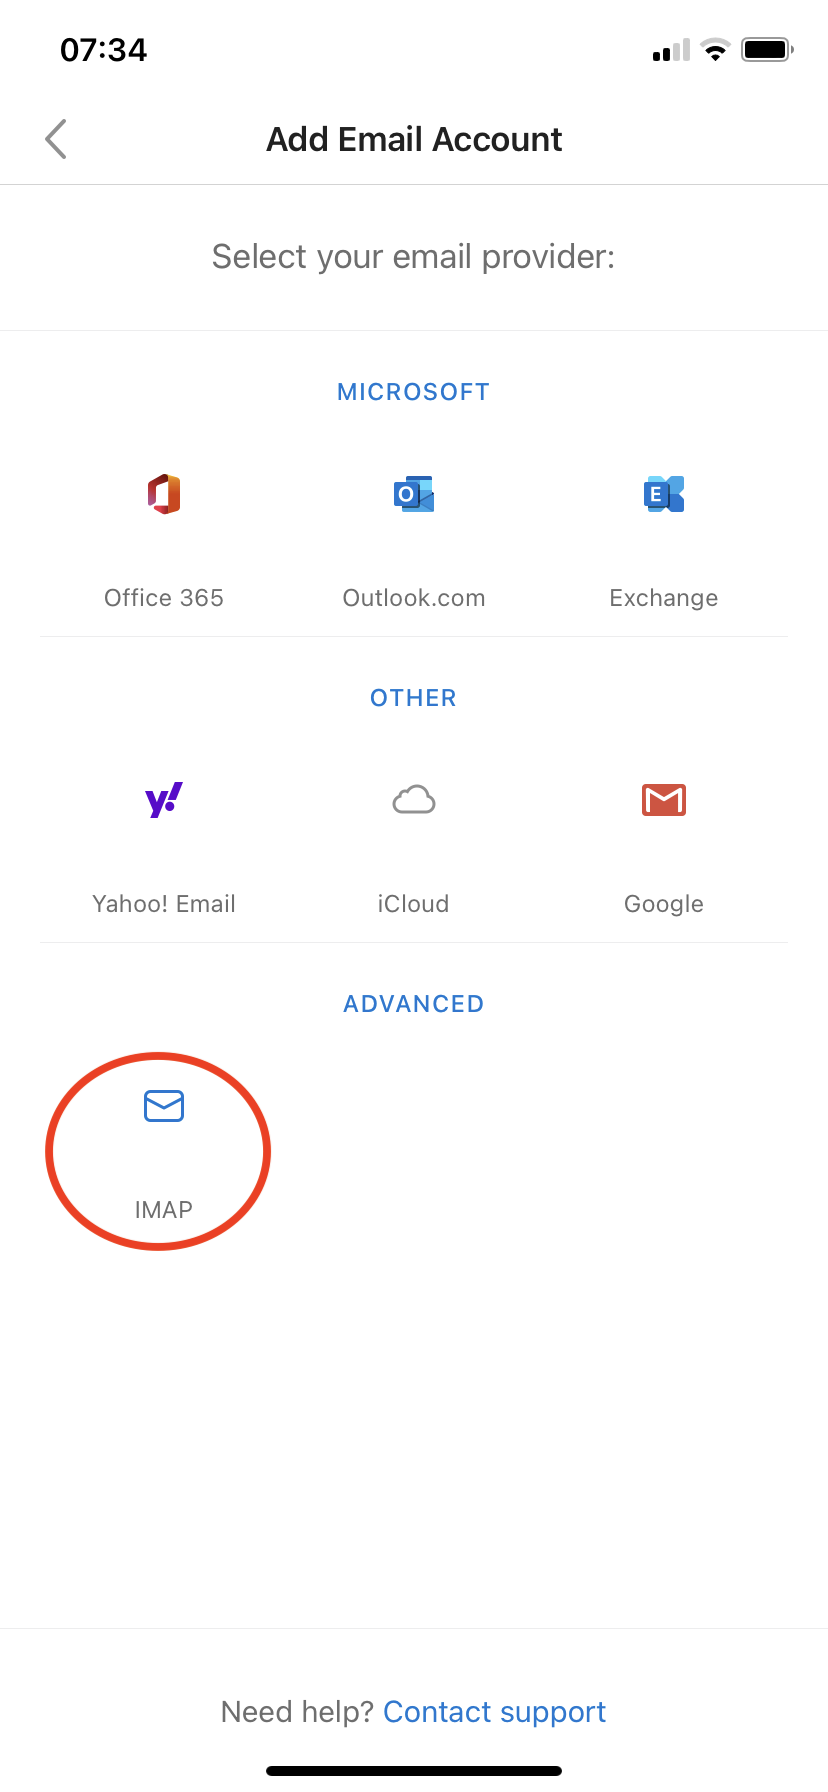
To create an @pt.lu email account, you must select the IMAP option below the Advanced section of the panel, which will display a panel with a configuration setup as well for IMAP Incoming as for SMTP outgoing :
4. IMAP Incoming Mail Server Setup
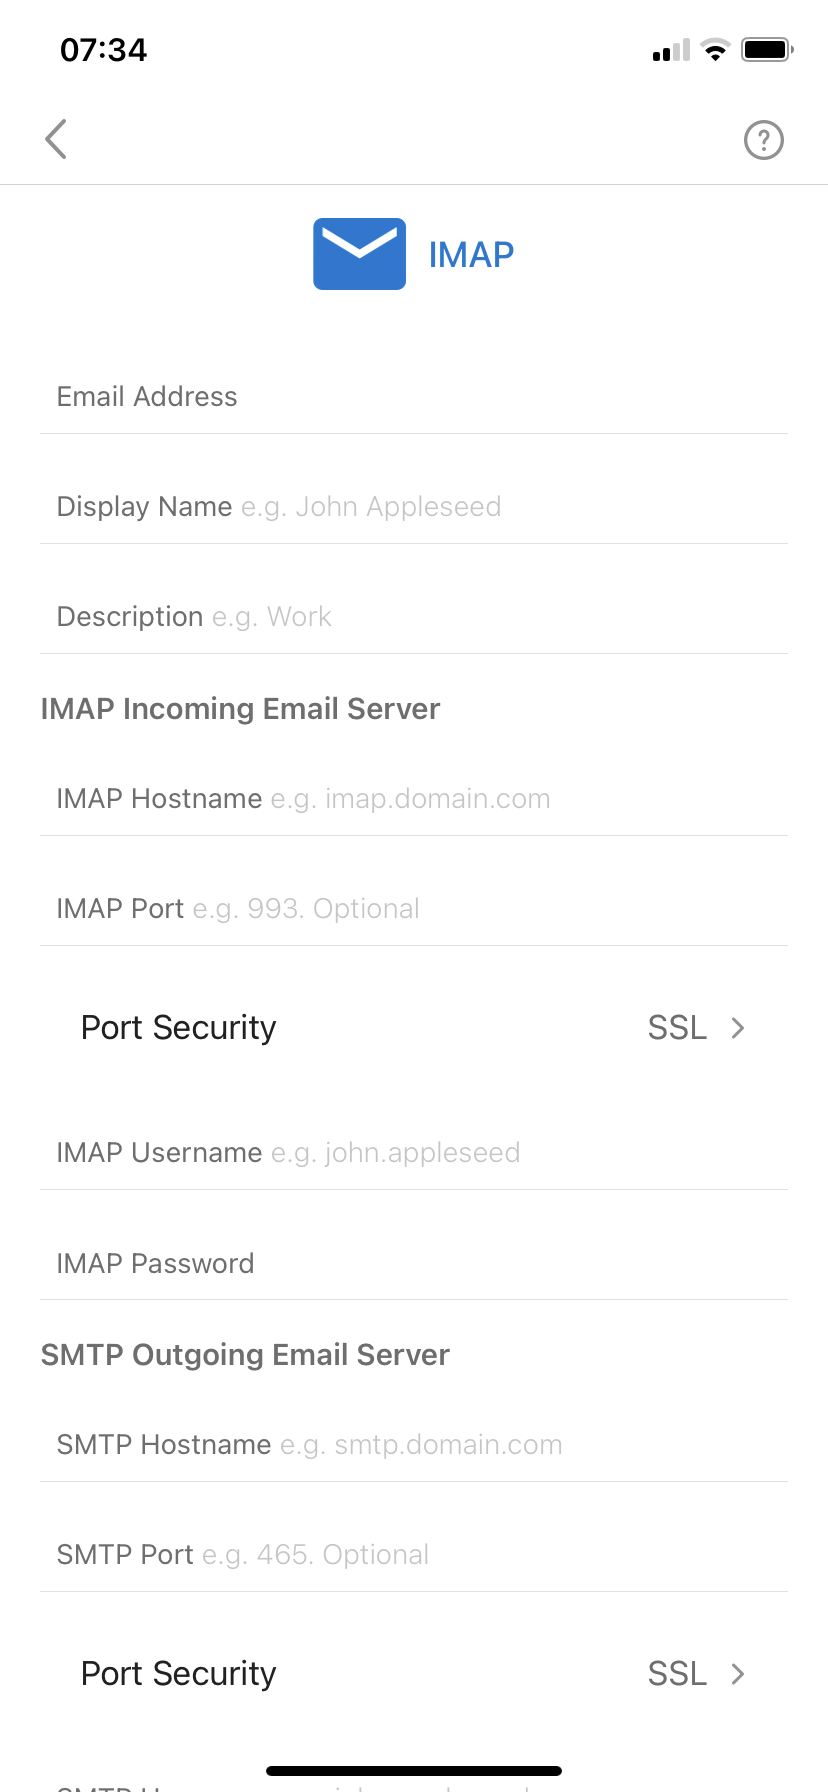
First we will define the configuration to receive your messages , this will be done by customizing the IMAP Incoming Mail Server Setup:
Some explications:
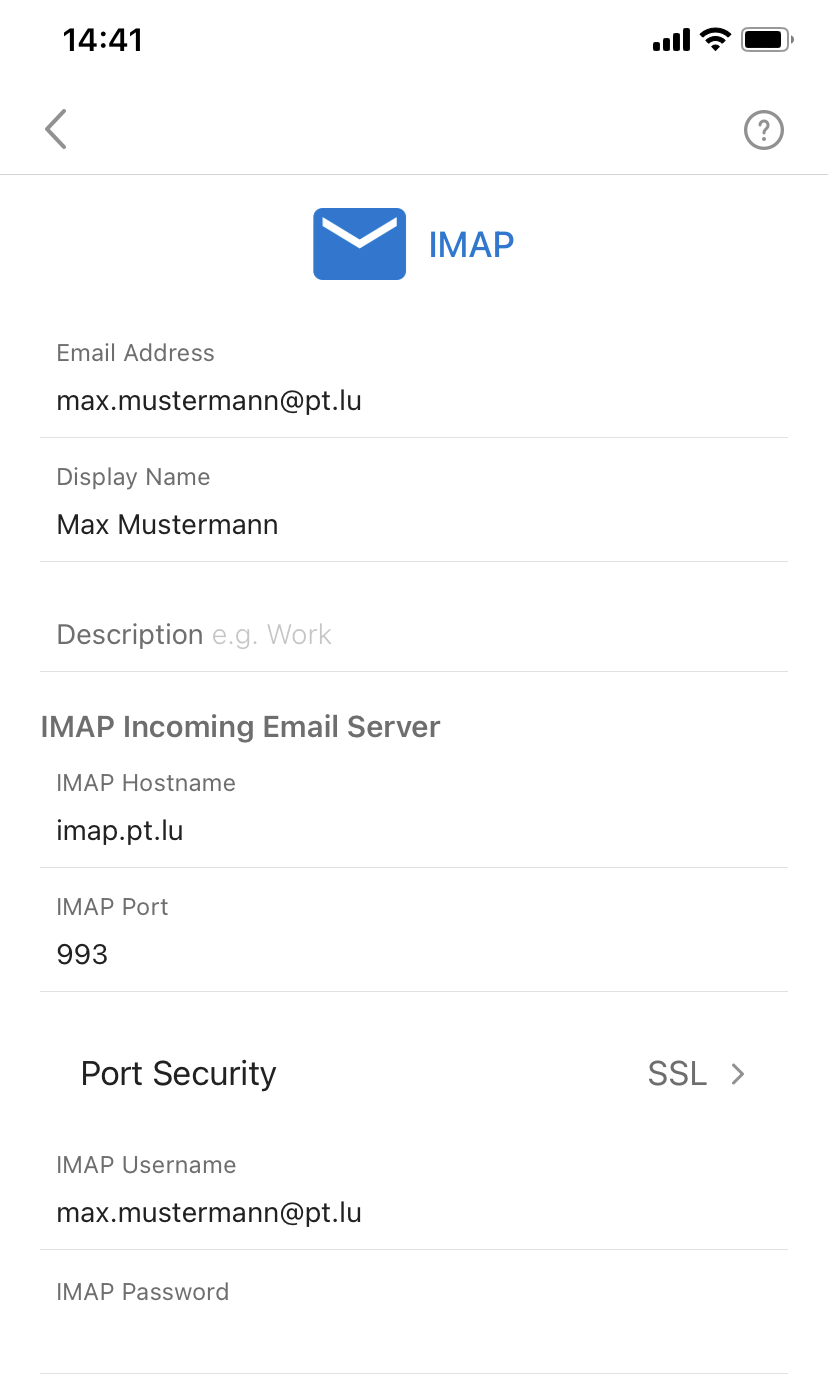
Email Address: enter your @pt.lu email address
Display Name: (optional) will be used as friendly name during message exchanges
Description: (optional) maybe used to better distinguish between several accounts defined in your Outlook app
IMAP Hostname: imap.pt.lu
IMAP Port: 993
Port Security: SSL
IMAP Username: you may specify your email address or your email account (Username)
IMAP Password: password for the above used email address/Username
(You may verify correctness of your password by logging in via webmail.pt.lu. If login works as expected, your password is correct)
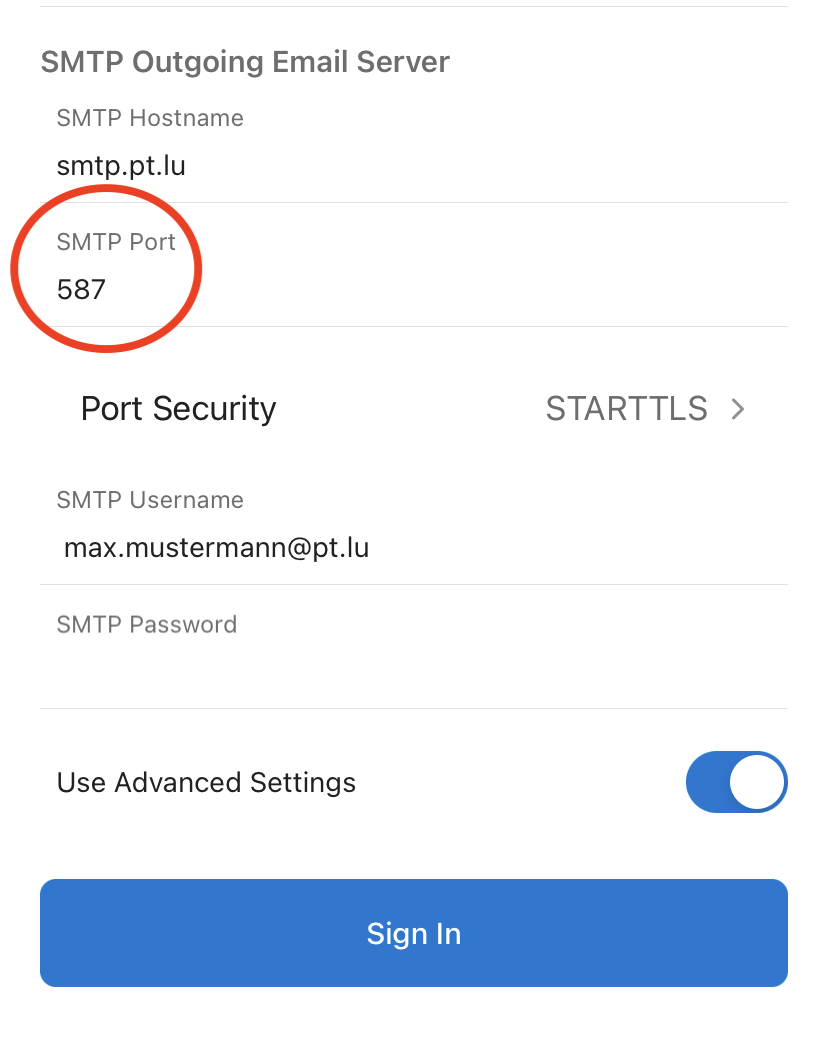
5. SMTP Outgoing Email Server Setup
On the the same panel, below the IMAP Incoming Email Server Setup, you will find the configuration to enable your Outlook app to send out messages into the internet – the SMTP Outgoing Email Server Setup:
Some explications:
SMTP Hostname: smtp.pt.lu
SMTP Port: 587
Port Security: STARTTLS
ATTENTION: when modifying the Port Security to STARTTLS, the SMTP Port may switch automatically to 465, please redefine the port to 587 before finalizing your email account configuration.
SMTP Username: identical to your configuration as for the IMAP Username
SMTP Password: identical to your configuration as for the IMAP Username
After having setup your IMAP and SMTP email configuration for your @pt.lu email address, please confirm by pushing the Sign In button.
6. Finalizing your email account setup
After having confirmed your setup, the Outlook app will display some panels regarding further customization.
Select the options as preferred and you will end up with a panel as following:
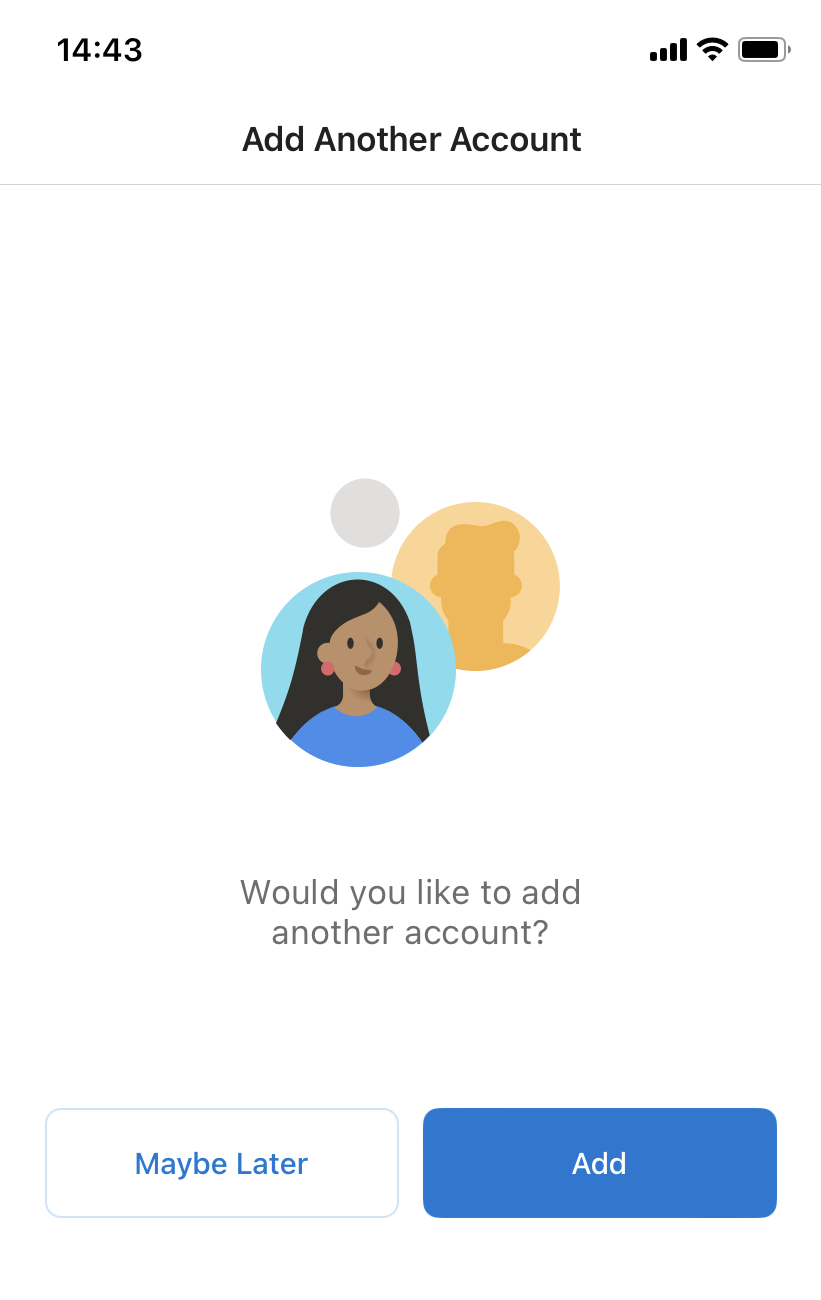
If you intend to add another email account select ‘Add‘ , else to have a view on your just created email account, select ‘Maybe Later’ :
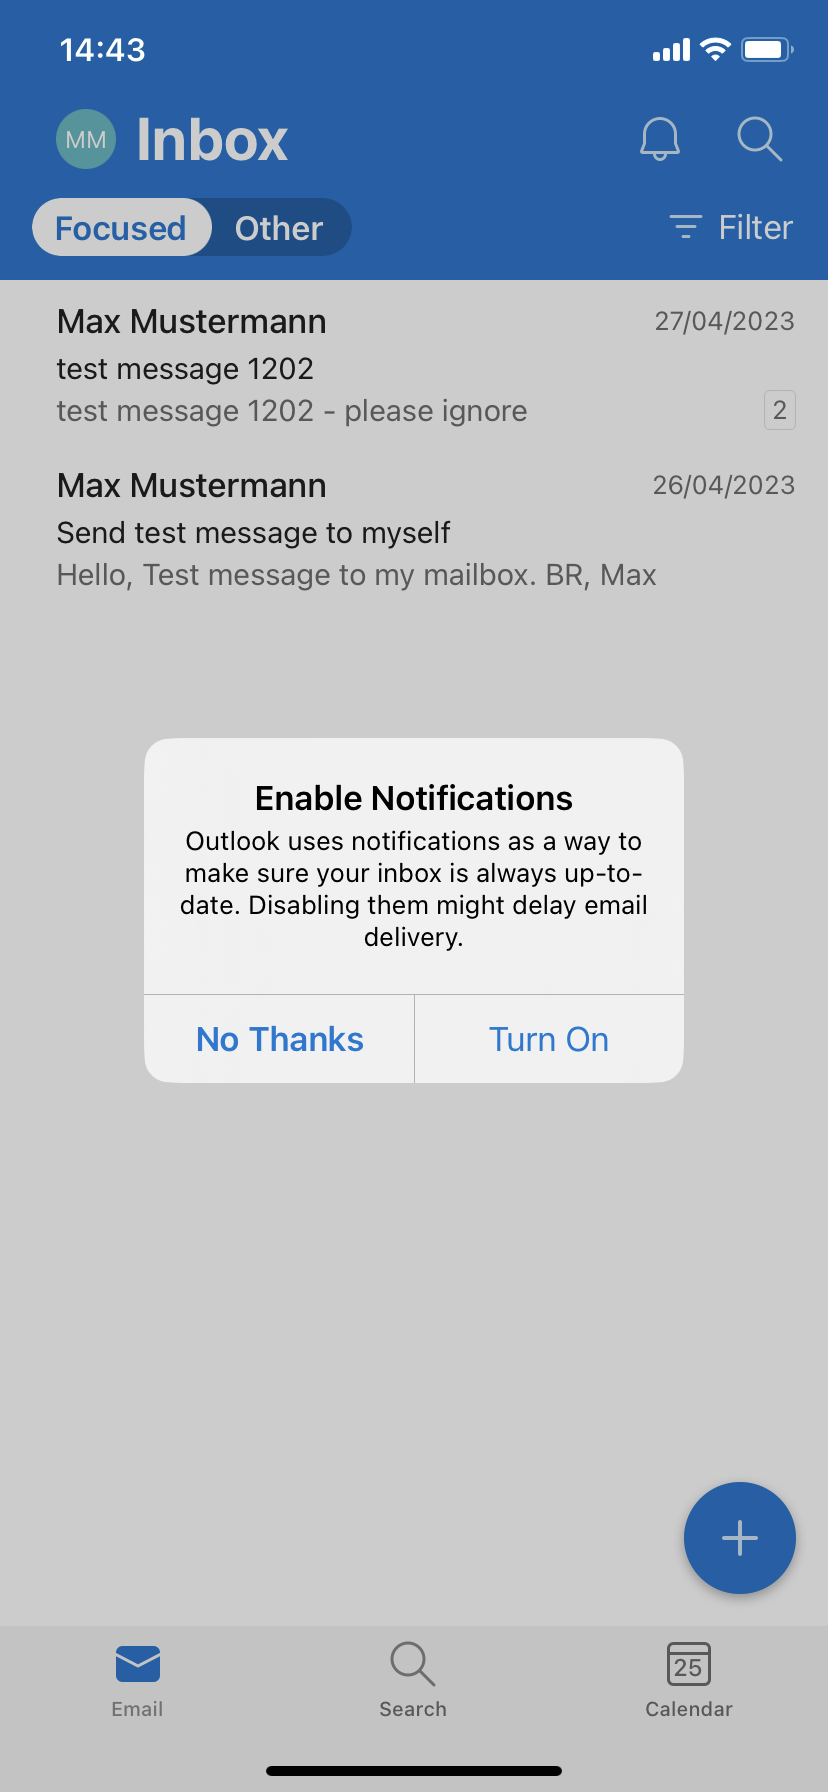
A last pop-up panel will respect your choice about Outlook notifications, which is recommended to enable, so that you are informed about new incoming messages or delivery problems.
Now, your @pt.lu email account has been configured correctly, and you are able to receive messages to your Outlook iOS app and send out messages into the internet from your Outlook app.
7. Modifications on an existing Email Account
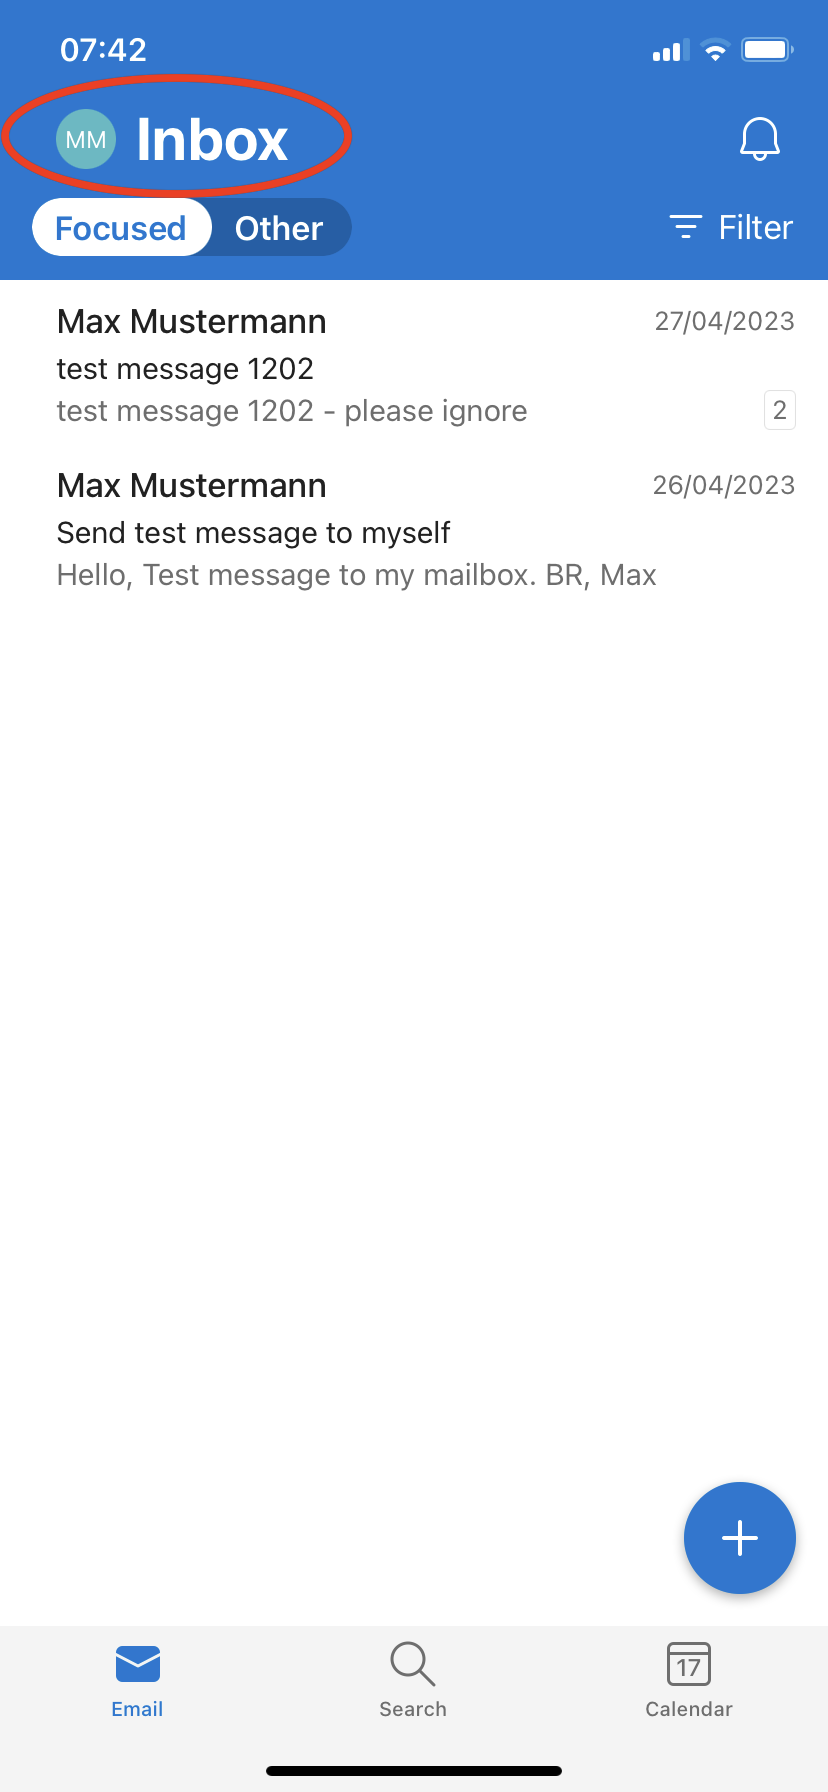
If you have already defined an @pt.lu email address/account, and you would like to apply some modifications, please follow descriptions below.
First select the email account to modify by pushing the ‘Inbox‘ button on top of the mailbox panel:
On the next panel select the Settings button at the bottom right:
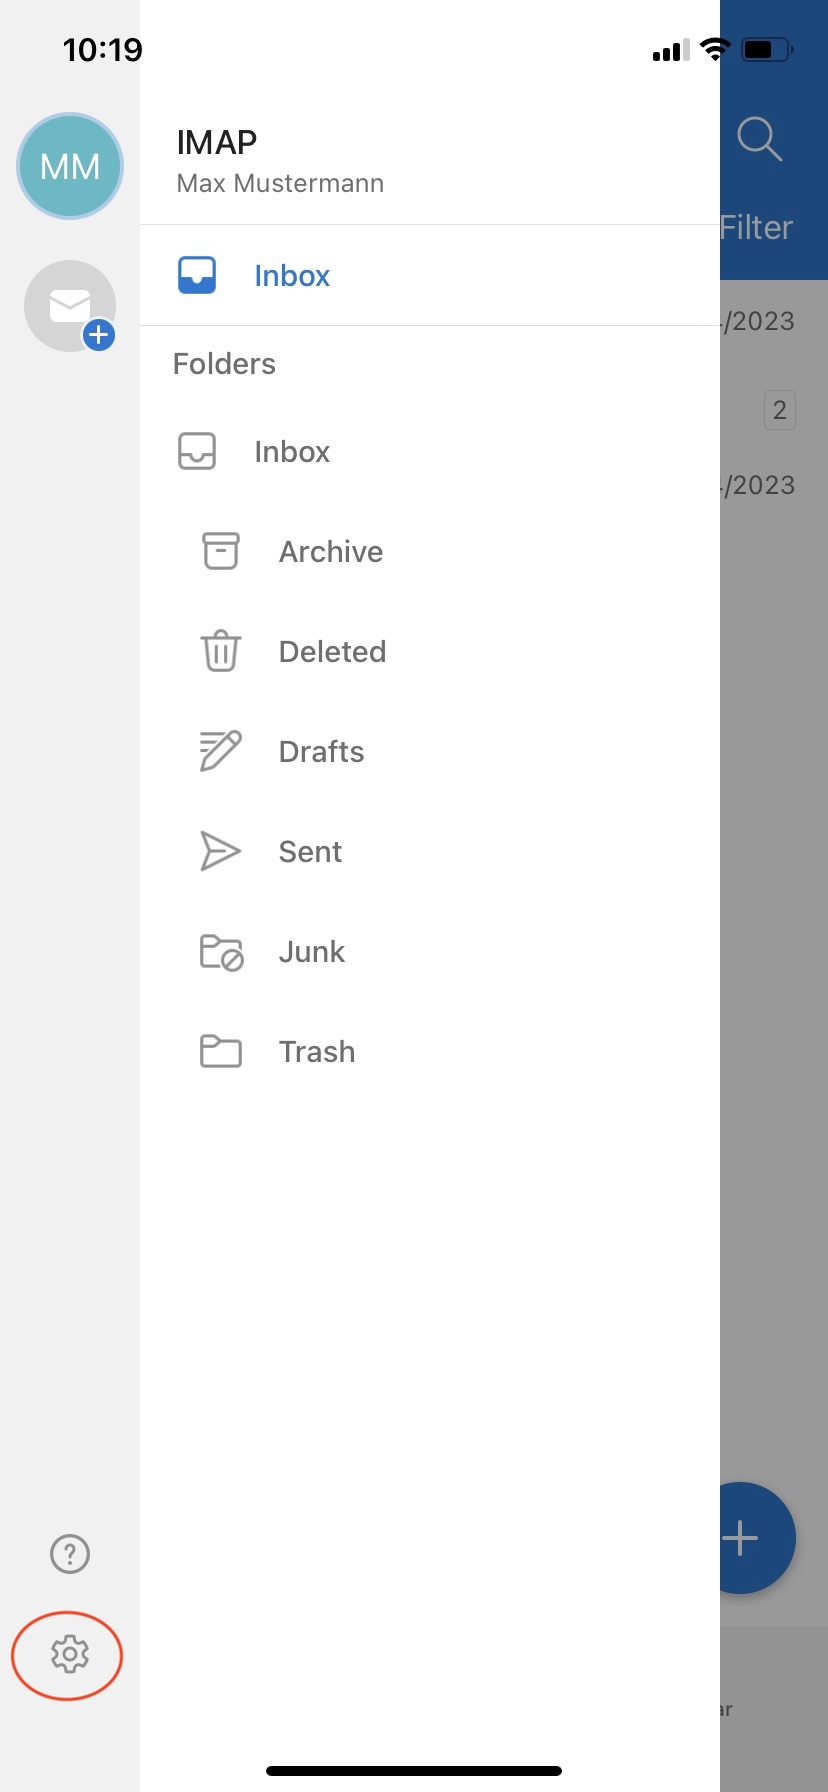
which will pop-up the panel of general Settings.
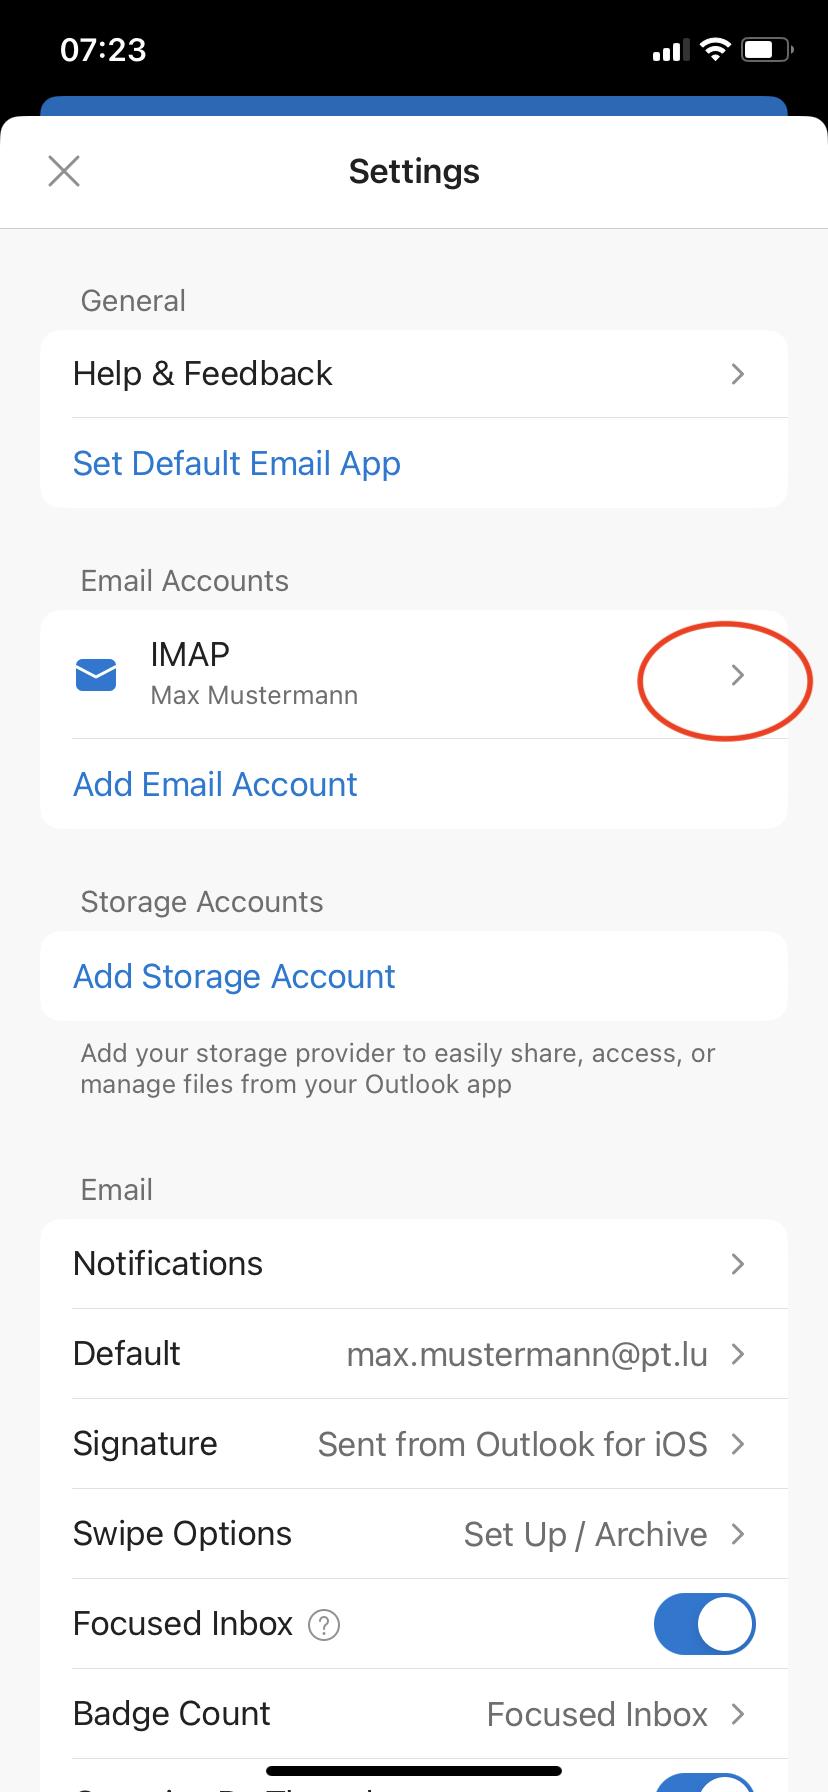
We would like to apply modifications to the IMAP/SMTP Email Account.
Please push the arrow (>) to access the IMAP configuration panel:
Pushing the arrow (>) near the IMAP config element, will open a panel as following:
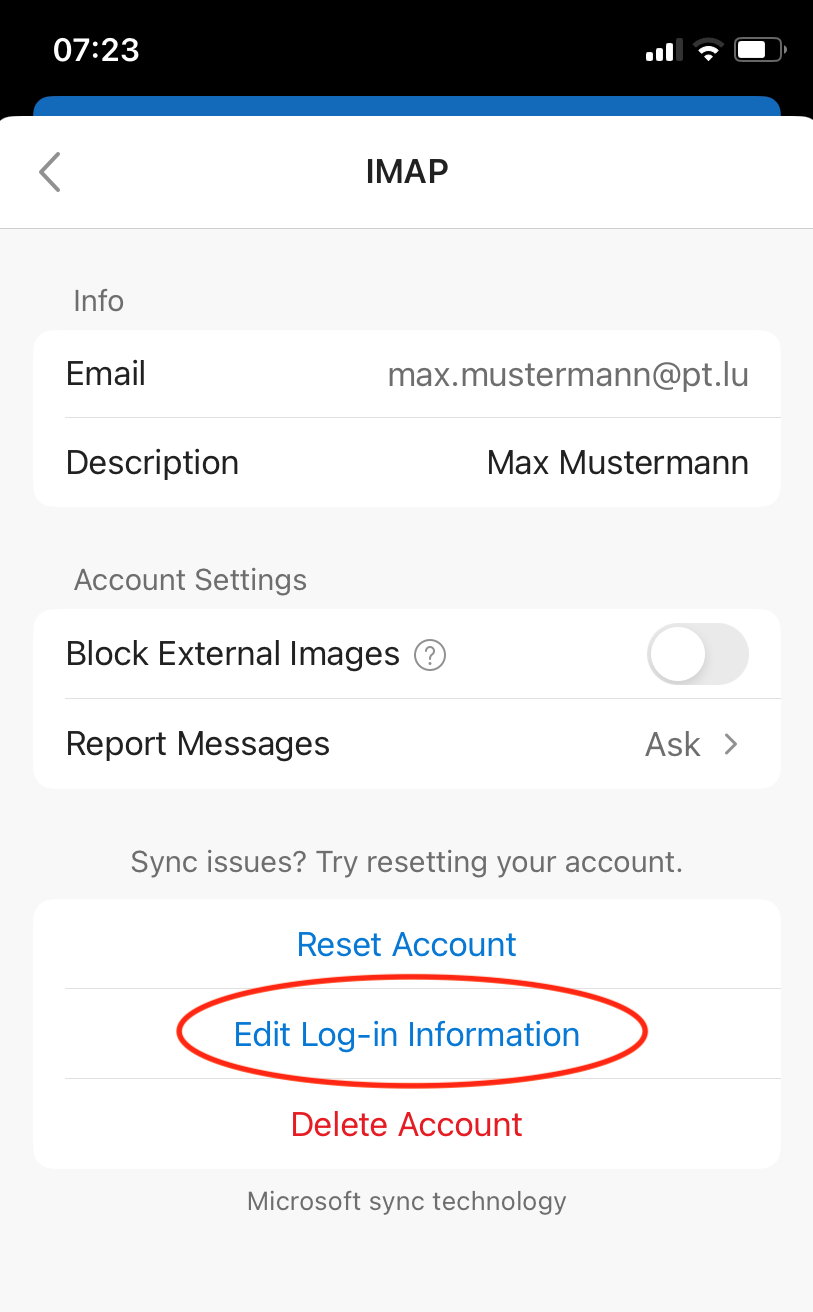
Here you must select the ‘Edit Log-in Information’ to get the IMAP configuration panel:
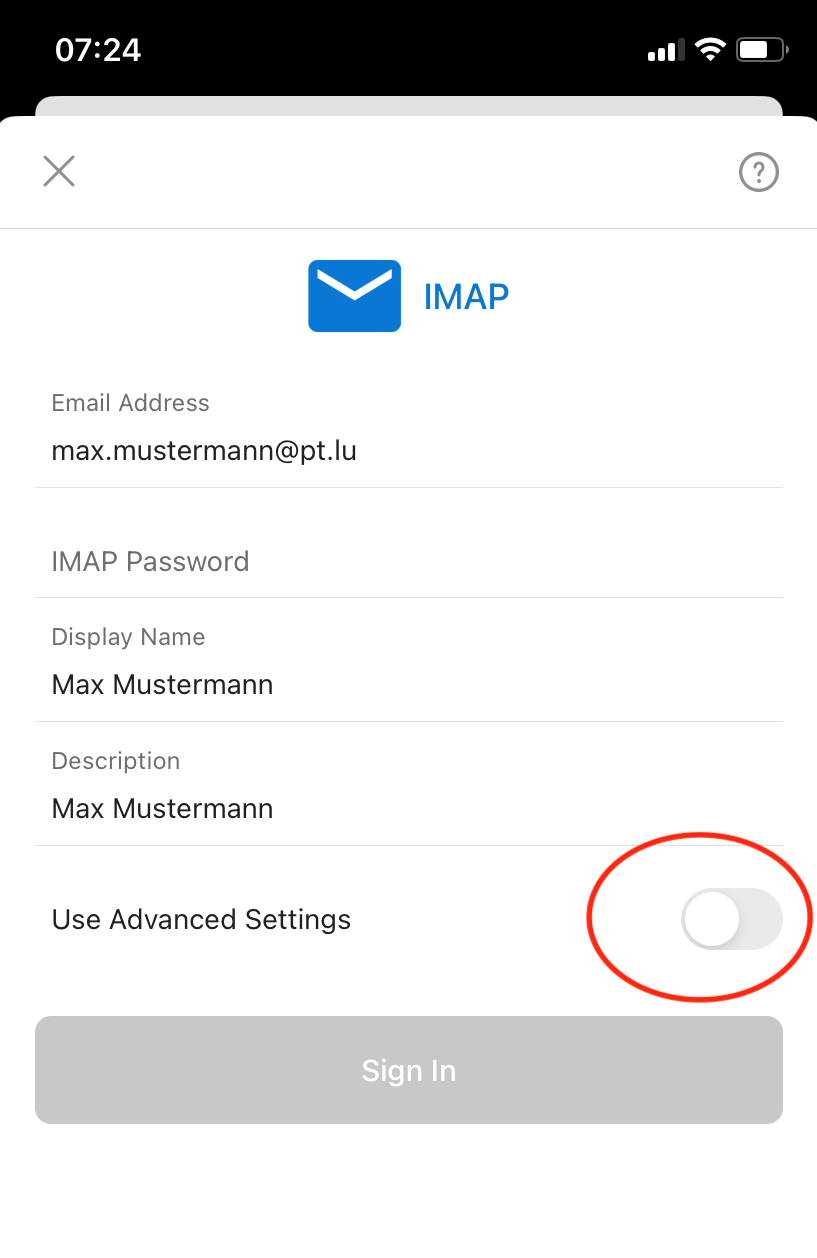
By default the IMAP configuration panel will display only the basic parameters (Email Address, IMAP Password).
To have access to the advanced settings, please slide the ‘Use Advanced Settings‘ button accordingly, which will guide you finally to the IMAP and SMTP email server setup panel.
Follow instructions as listed in:
After having applied modifications as indicated during the above listed steps, your email accounts is configured correctly – using authenticated and encrypted IMAP & SMTP channels.